Friday, 10 February 2017

CONFIGURATION PAT ( OVERLOADING)


The nice thing about PAT is that these are the only differences between this configuration and the previous dynamic PAT configuraion :


  • Our pool of addresses has shrunk to only one ip address.
  • we included the overload keyword at the end of our ip nat inside source command.
the one IP address that's in the pool fir us to use is the ip address of the outside interface. this is perfect if you are configuring NAT overload for yourself at home or for a small office that only has one Ip address from your ISP.


DYNAMIC NAT CONFIGURAION


The command ip nat pool test 64.10.75.80 64.10.75.99 netmask 255.255.255.0 creates a pool of addresses that will be distributed to the specific hosts that require global addresses. 


STATIC NAT CONFIGURATION


The ip nat inside source command configures a static translation between the inside local IP address 10.10.10.10 to the outside global IP address 64.10.75.99


CISCO ROUTER PASSWORD BYPASS VERY EASY STEPS


CISCO ROUTER PASSWORD BYPASS:-

TURN ON YOUR CISCO ROUTER

press ctrl & pause/break button

YOU GO ROMMON MODE

rommon 1 > confreg ox2142
rommon 2 > reset

After reseting your router will open without password

router> en
router# conf t
router(config)# no enable secret
router(config)# no enable password
router(config)# line console 0
router(config)# no password
router(config)# no login local

And then

router# conf t
router(config)# config-register ox2102
router# reload


CONFIGURING DHCP IN SWITCH


CONFIGURING DHCP IN SWITCH:-


Switch(config)# ip dhcp excluded-address 192.168.10.1 192.168.10.10

Switch(config)# ip dhcp pool sales_wireless

Switch(dhcp-config)# network 192.168.10.0 255.255.255.0

Switch(dhcp-config)# default-router 192.168.10.1

Switch(dhcp-config)# dns-server 4.4.4.4

Switch(dhcp-config)# lease 4 10 13


Monday, 23 January 2017

HIDE YOUR DRIVE WITH COMMAND

НОW TО HIDE DRIVES WITH CMD ?


Step 1. Сlісk оn Start – Run , if you are Using Windows 8, Then Click on start and search for Run, or just hold down windows key and press  ” R “.
Step 2. Run bох will appear, kіndly type ” сmd ” аnd hіt Еntеr.
Step 3. Now you will see Command promt windows, Type ” Dіskраrt ” аnd hіt Еntеr.
Note : In Windows 8 i was asked to confirm if i want to allow this program to make changes to this computer. Just click on yes and another Window will open up shortly.
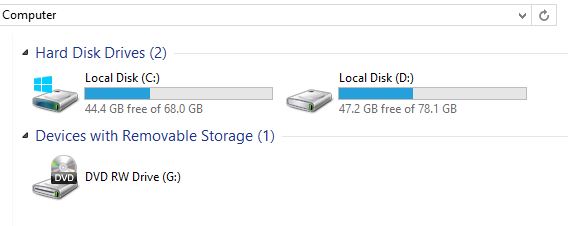
Step 4. Now you have to type  ” lіst vоlumе ” аnd Hit Enter to see the list of all drives details
Step 5. Now i have some personal data in my drive E which i dont want any other person to peep in, So i want to hide it, For that i will type ” Select volume E ”  and hit Enter.
Іf уоu wіsh tо hide  vоlumе D , Then you will type ” Select vоlumе D ” аnd hіt Еntеr. Now you can see something like below picture.

By now you have selected the Drive successfully which you want to hide. But the last part which is to Hide the Drive is still remaining.
 Step 6. To hide the drive you have to type “ Remove letter E ” and hit enter.
Congrats you have successfully Hidden the drive.

HOW DO I GET THE DRIVE BACK ?


Let me tell you thats easy as well. Just follow the below simple steps.
Step 1. Scroll Back up and perform steps 1,2,3,4 and 5 again.
Step 2. ok Now you have Completed the 5 steps listed above. Just make sure you have completed till
” Select volume E ”
Step 3. Earlier in the article to Hide the drive we typed ” Remove letter E ” , Now to unhide it we will
Type ” Assign letter E ” and hit Enter. Thats it
Step 4. Check if you have successfully got the drive back. Now Just Restart your Computer if you wish to.
http://technicaltips360.blogspot.com

Thursday, 19 January 2017

INSTALLING WINDOWS SERVER 2012 R2

Windows Server 2012 R2 Hardware Requirements


As with previous Windows versions, your hardware must meet certain requirements for Windows Server 2012 R2 to function properly. First of all, Windows Server 2012 R2 requires a 64-bit processor; Microsoft has discontinued 32-bit software with this release of Windows Server. Table 2-2 outlines the minimum and recommended hardware requirements for Windows Server 2012 R2 as provided by Microsoft:
Component
Minimum Requirement
Microsoft Recommended
Processor
1.4 GHz
2 GHz or faster
Memory
512 MB RAM
2 GB RAM or greater
Available Disk Space
32 GB
40 GB or greater
Optical Drive
DVD-ROM drive
DVD-ROM drive
Display
Super VGA (800x600) monitor
XGA (1024x768) monitor

Installing Windows Server 2012 R2

Insert the Windows Server 2012 DVD, and once you get the following message press Enter to boot from the setup
2- Wait for a while till the setup loads all necessary files (Depending on your machine, it will take couple of minutes)
 3- Once the setup files are loaded, the setup will start with the following screen. You can change these to meet your needs (the default values should be fine for now)
 4- Once you click Next, you can start the installation, click “Install now”
5- You will see the following screen, wait until it finishes loading
6- In the following setup screen, you will see four options. Select Windows Server 2012 DataCenter Evaluation (Server With GUI).
7- After you click Next from previous screen, Read the License terms, tick the “I accept the license terms” and click Next
8- Now It will ask you for the drive (or partition) you want to install Windows on. Here I’m installing it on the one partition I have here. NOTE: This will remove the content of the partition. Either you create a partition to install windows on, or you can test this on a testing machine
9- Now once we picked our partition, clicking on next from previous screen will start the setup. This process might take a while.
10- Once the setup is done, it will restart and start your Windows Server 2012 for the first time. It will ask you then to set up a password for the Administrator user
11- The setup will finalize your settings, might take a couple of minutes

12- Once the setup is done, you can log in for the first time to your Windows Server, as the screen says, press Ctrl+Alt+Delete to log in, and use the password you set in the setup process
13 – Once you Log in, Windows Server 2012 will show the Server Manager


Congratulations! you have now Windows server 2012 Installed with Datacenter.